Honeywell TH6220D1028 Installation Manual Article Plan
This article outlines a comprehensive guide to the Honeywell TH6220D1028 thermostat. It covers aspects from initial unboxing to troubleshooting. The guide includes pre-installation steps, detailed wiring instructions, and configuration. This helps users and installers understand thermostat setup ensuring optimal performance and comfort control based on the manual.
The Honeywell TH6220D1028, a model from the FocusPRO series, is a widely used programmable thermostat designed for residential and commercial applications. This thermostat offers a balance between ease of use and advanced features. It is suitable for controlling heating and cooling systems, providing precise temperature management and energy efficiency. The TH6220D1028 is known for its clear display, intuitive interface, and reliable performance.
This installation manual aims to provide a step-by-step guide for properly installing and configuring the Honeywell TH6220D1028 thermostat. Whether you are a homeowner looking to upgrade your current thermostat or a professional installer, this guide offers valuable information to ensure a successful installation.
The manual covers essential aspects such as pre-installation checks, wiring instructions, power options, and installer setup. Additionally, it addresses common troubleshooting issues that may arise during or after installation. By following the instructions in this manual, users can maximize the functionality of their TH6220D1028 thermostat and achieve optimal comfort in their living or working spaces. The manual also includes references to where users can find additional support and documentation.
Key Features and Benefits
The Honeywell TH6220D1028 thermostat offers a range of features designed to enhance user experience and improve energy efficiency. One of its key benefits is its programmable functionality, allowing users to set different temperature schedules for weekdays and weekends. The thermostat supports either a 5-1-1 (Weekdays, Saturday, Sunday) or 5-2 (Weekdays, Weekend) programming schedule, catering to various lifestyle needs.
The large, clear, backlit display ensures easy readability in diverse lighting conditions, enhancing user convenience. Precise comfort control maintains a consistent temperature within +/-1°F, providing a high level of accuracy and comfort. Simplified programming and operation make the thermostat user-friendly, even for those unfamiliar with advanced thermostat settings.
The easy-change battery door allows for quick battery replacement without needing to remove or disassemble the thermostat, simplifying maintenance. Built-in instructions provide immediate guidance, eliminating the need to search for manuals. Adaptive Intelligent Recovery ensures that the desired temperature is reached at the programmed time, optimizing energy usage. These features combine to make the Honeywell TH6220D1028 a reliable and efficient choice for home temperature management, backed by available online support and comprehensive documentation.
Pre-Installation Checklist
Before commencing the installation of the Honeywell TH6220D1028 thermostat, it is crucial to complete a pre-installation checklist to ensure a smooth and successful setup. Begin by verifying that the thermostat is compatible with your heating and cooling system. This model supports standard systems, including those with up to 2 heat and 2 cool stages.
Next, gather all necessary tools, such as a screwdriver, wire stripper, level, and possibly a drill for mounting. Turn off the power to the existing thermostat at the circuit breaker to prevent electrical shock during wiring. Carefully remove the old thermostat from the wall, and label each wire connected to it with the corresponding terminal designation.
Inspect the wires for any damage or corrosion, and clean or replace them as needed. Check the installation location to ensure it meets optimal conditions: about 5 feet (1.5 meters) above the floor in an area with good air circulation and away from direct sunlight or drafts. Finally, have the new thermostat, mounting hardware, and the Honeywell TH6220D1028 installation manual readily available. Completing this checklist ensures a safer and more efficient installation process.
Step-by-Step Installation Guide
Installing the Honeywell TH6220D1028 thermostat involves several key steps to ensure proper functionality. First, carefully unpack the thermostat and verify that all components are present, including the thermostat body, wall plate, screws, and installation manual. Detach the wall plate from the thermostat body, typically by gently pulling it away.
Position the wall plate on the wall at the desired location, ensuring it is level. Use a pencil to mark the screw holes. If necessary, drill pilot holes at the marked locations. Secure the wall plate to the wall using the provided screws.
Next, refer to your wiring diagram (created during the pre-installation checklist) and connect the wires to the corresponding terminals on the wall plate. Ensure each wire is securely fastened. Once all wires are connected, carefully align the thermostat body with the wall plate and gently snap it into place.
Insert batteries into the thermostat, if required for operation. Finally, restore power to the thermostat at the circuit breaker. Follow the on-screen prompts to configure the thermostat settings, such as date, time, and temperature preferences. Test the heating and cooling system to verify that the thermostat is functioning correctly. Consult the troubleshooting section of the manual if issues arise.
Wiring Instructions
Proper wiring is crucial for the Honeywell TH6220D1028 thermostat to function correctly. Before beginning, always turn off power to your HVAC system at the circuit breaker to avoid electrical shock. Carefully remove your old thermostat and note the existing wiring configuration. It’s highly recommended to take a picture or draw a diagram of the existing wiring before disconnecting anything;
The TH6220D1028 supports various system types, including single-stage and multi-stage heating and cooling systems. Identify the wires connected to your old thermostat and match them to the corresponding terminals on the TH6220D1028 wall plate. Common terminals include R (power), W (heat), Y (cool), G (fan), and C (common). If you have a heat pump system, you may also have wires connected to terminals such as O/B (reversing valve).
Connect each wire securely to the appropriate terminal on the new thermostat’s wall plate. Ensure that no bare wire is exposed. If you have any unused wires, cap them off with wire connectors. Double-check your wiring against your diagram and the thermostat’s installation manual to ensure accuracy. Incorrect wiring can damage your HVAC system or the thermostat.
After wiring, gently tuck the wires back into the wall and attach the thermostat body to the wall plate. Restore power to the HVAC system and test the thermostat’s functionality.
Power Options and Mounting
The Honeywell TH6220D1028 thermostat primarily operates on battery power. This provides flexibility in placement, removing the need for direct wiring to a power source specifically for the thermostat itself. The device uses two AA alkaline batteries to maintain its settings and operate the display and controls. A low battery indicator will appear on the screen when the batteries need replacement, ensuring uninterrupted operation.
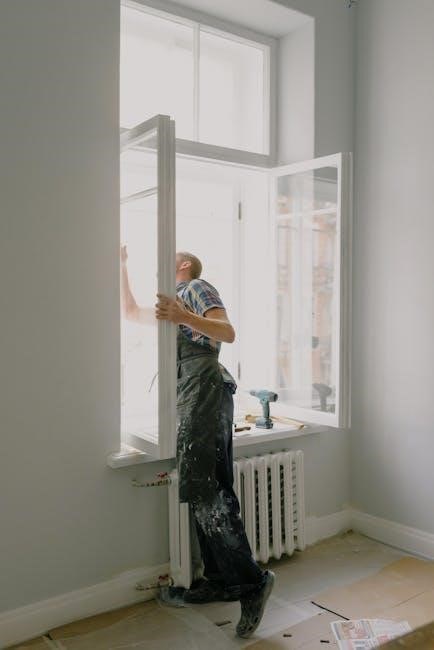
The mounting location is crucial for accurate temperature sensing. Install the thermostat about 5 feet (1.5 meters) above the floor in an area with good air circulation and average temperature. Avoid placing it in direct sunlight or near heat sources like lamps or appliances, as this can affect temperature readings. Also, avoid mounting it on an outside wall, which can be colder than the rest of the room and impact accuracy.
The wall plate should be securely mounted to the wall using the provided screws and anchors. Ensure the wall is clean and free of debris before mounting. Level the wall plate before tightening the screws to ensure the thermostat sits straight. After mounting the wall plate and connecting the wires (as described in the wiring section), the thermostat body can be attached to the wall plate, completing the physical installation.

Installer Setup and Configuration
The Honeywell TH6220D1028 thermostat includes an installer setup menu to configure specific settings for your heating and cooling system. Accessing this menu typically involves pressing and holding certain buttons simultaneously, as detailed in the installation manual. Within this menu, you can configure system type, such as heat pump, conventional heating, or cooling systems.
One crucial setting is the cycle rate, which determines how frequently the thermostat turns the heating or cooling system on and off to maintain the desired temperature. Adjusting this can optimize comfort and energy efficiency. Another important option is the auto changeover feature, which allows the thermostat to automatically switch between heating and cooling modes based on the indoor temperature. This ensures consistent comfort throughout the year without manual adjustments.
The installer setup also allows for calibration of the temperature sensor if necessary. If the thermostat’s temperature reading differs significantly from a calibrated thermometer, you can adjust the offset within the setup menu. Finally, a system test function allows you to verify that the thermostat is correctly controlling the heating and cooling equipment. This ensures proper wiring and configuration, confirming that the system responds as expected to thermostat commands. Refer to the manual for specific steps and options available in the installer setup.
Troubleshooting Common Issues
The Honeywell TH6220D1028 thermostat, while generally reliable, may occasionally encounter issues. One common problem is the thermostat displaying a blank screen or not powering on. This is often due to depleted batteries, so replacing them is the first step. Ensure the batteries are correctly oriented in the battery compartment.
Another frequent issue involves the thermostat blowing cold air when it should be heating, or vice versa. This typically indicates incorrect wiring. Double-check the wiring connections against the wiring diagram in the installation manual, ensuring each wire is connected to the correct terminal. Incorrect system type configuration in the installer setup can also cause this. Verify that the system type setting matches your heating and cooling system.
If the thermostat constantly cycles the heating or cooling system on and off too frequently, adjust the cycle rate in the installer setup menu. An improperly calibrated temperature sensor can lead to inaccurate temperature readings, resulting in discomfort. Compare the thermostat’s reading to a calibrated thermometer and adjust the offset in the installer setup if needed. If these steps don’t resolve the issue, consult a qualified HVAC technician.
Finding the User or Installation Manual
Locating the user or installation manual for your Honeywell TH6220D1028 thermostat is crucial for proper setup and troubleshooting. The most convenient way to find the manual is online. Start by visiting the official Honeywell Home website. Navigate to the support section and search for “TH6220D1028” in the product search bar. This should lead you to a page where you can download the user manual and the installation guide in PDF format.
If you have the original packaging, the manual might be included as a printed document inside the box. Check all compartments and folds within the packaging. Many online retailers, such as Amazon, also provide links to the manual on the product page for the Honeywell TH6220D1028. Websites like ManualOwl.com and other online manual repositories may also host the manual for download.
If you still cannot find the manual, consider contacting Honeywell’s customer support directly. They can often provide a digital copy via email or guide you to the correct download link. Remember to have the thermostat model number (TH6220D1028) readily available when contacting support to expedite the process.